Liquitex Heavy Body Acrylic Paint: A Procurement Review, Color Mixing Chart, and Cleanup Tips
-
When this checklist works
-
Step 1: Estimate paint consumption before you compare prices
-
Step 2: Compare cost per milliliter, not per tube
-
Step 3: Check safety labels like your budget depends on it
-
Step 4: Build a Liquitex acrylic paint color mixing chart and actually use it
-
Step 5: Track product age and plan for cleanup
-
If something still feels off
-
Bottom line
If you're here because you've been reading Liquitex heavy body acrylic paint reviews, let me save you some time. I'm not going to repeat the same line about pigment strength and buttery consistency. I'm writing this as a procurement manager who has spent the last six years buying artist-grade materials for a mid-size school district. I manage an art supply budget of about $60,000 a year and have negotiated with more vendors than I want to re-count. This is the checklist I wish someone had handed me before our first big order.
One caveat before the steps: this advice is oriented to educational institutions, art centers, and B2B buyers. I can't speak to a solo artist's needs in the same way. At least, not with the same confidence.
When this checklist works
Use this when you're comparing heavy body acrylic paint for a classroom, an art club, a summer camp, or a small wholesale order. You have end users who will break, waste, and mix things in ways you didn't plan for. That's not a criticism; it's the context. The question isn't which paint is the most artistically reputable. The question is: which paint gives the best learning outcome per dollar spent, and how do you avoid the small mistakes that silently raise your total cost.
In our high school art program, that means 12 classes per week, roughly 24 students per class, and 90-minute sessions. If you're stocking a retail shelf or making a one-time purchase for an online art class, the numbers will look different. The process is still the same: know the workload before you know the paint.
Step 1: Estimate paint consumption before you compare prices
Before opening any catalog, we estimate the real workload. Based on our inventory records over the past two years, one class set of Heavy Body acrylics lasts about three semesters. Maybe two and a half; I'd have to check the exact order history, but it's close enough. What matters is that this number drives the size and quantity we buy.
When I talk with teachers, I ask three questions: How many students per session? How much palette waste is normal? Are they painting on paper, canvas, wood, or all of the above? You'd be surprised how many purchasing decisions get made without this step. We made that mistake in 2023, when we bought a deal on 59ml tubes that were too small. The teachers went through them in a month.
You don't need a median calculator for this part. A simple spreadsheet with columns for class size, hours per week, and projects per term is enough. The point is to calculate paint per student, not tubes per classroom.
Step 2: Compare cost per milliliter, not per tube
This is where the real savings show up. Retail price is a headline; cost per milliliter is the underlying number. Put another way, a 59ml tube of Liquitex Heavy Body might be $7.95, and a 118ml tube might be $12.75. The larger tube is about 23% cheaper per milliliter. In our last comparison, the 473ml bottle was $32.50—no, $34.20, I'm mixing it up with another vendor's quote—which works out to roughly $0.07 per ml. That's a meaningful difference when you're ordering for eight classrooms.
To avoid getting anchored by one low quote, I compare at least three distributors. I list price per ml, per size, and shipping cost. Then I run a quick median. The median across our five most recent distributor quotes for a 473ml bottle of Liquitex Heavy Body was about $0.078 per ml, based on January 2025 booking data. Verify current pricing with your rep; these numbers move.
Cost rule of thumb: price per ml is the number that matters. The bigger tube usually beats the smaller tube, but only if your team will actually finish it before it dries up. In an active classroom, they will.
Everything I'd read before our first order said professional-grade paint is for professional artists. In practice, for a classroom that paints at least once a week, Heavy Body ended up cheaper per student because students used less paint per session. The thicker body means students don't pour as much on the palette, and the stronger pigment means they don't need as many coats for coverage.
Step 3: Check safety labels like your budget depends on it
School buyers have a responsibility to check safety standards. According to the Art & Creative Materials Institute (artandcreativeinstitute.org), the AP Seal means the product has been approved as non-toxic for artistic use. Liquitex publishes AP Seal info on its product pages (liquitex.com, accessed January 2025). But here's the nuance: not every color has the same approval. Some pigments still use heavy metals, and the labeling tells you which ones.
A lot of the Liquitex Heavy Body line is cadmium-free, which is a separate promise from AP approval. Cadmium-free means they don't use cadmium pigments, but it doesn't automatically mean safe for everything. We still require our suppliers to send a PDF of the SDS for every color we order.
I'll be honest: one time I skipped this review. I knew I should verify the batch SDS, but I thought it was the exact same order as last year. It wasn't—a color reformulated between orders, and a teacher caught the difference before students used it. Close call. Nothing got scrapped, but it taught me to make the label check a permanent part of our workflow.
Step 4: Build a Liquitex acrylic paint color mixing chart and actually use it
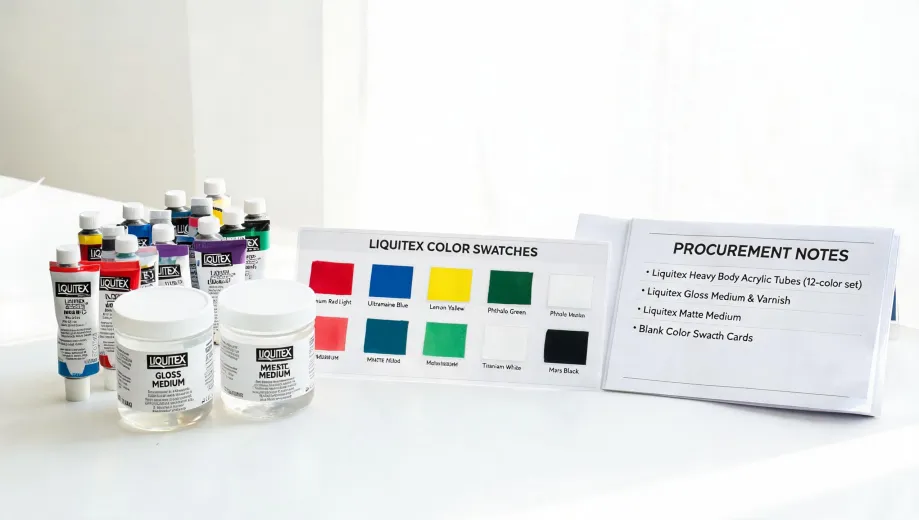
One of the best ways to control costs is to stop buying every color in the rainbow. A considered palette with six or eight tubes can create more colors than a 24-pack of pre-mixed colors, and it trains students to understand hue. The key is to have a reliable color mixing chart, or to make your own based on the specific colors you stock.
Here's the basic chart we post near our sinks. It's not an official Liquitex document; it's based on our tests with Heavy Body colors:
- Phthalo Blue (Green Shade) + Cadmium-Free Yellow = a bright, high-chroma green
- Quinacridone Magenta + Phthalo Blue = a surprisingly clean violet
- Cadmium-Free Red + Ultramarine Blue = a neutral violet, closer to a shadow color
- Yellow Ochre + Phthalo Blue = a natural, earthy green that works for landscapes
- Burnt Sienna + Titanium White = a warm flesh tone base (with further adjustments)
Liquitex's own website also has a mixing guide for Heavy Body Acrylics (accessed January 2025). We print a simplified version for each classroom. This chart helps students mix intentionally instead of grabbing dozens of open tubes. From a cost standpoint, fewer open containers means less waste. From a quality standpoint, the finished work looks more considered, and that's how a program builds a strong reputation.
Step 5: Track product age and plan for cleanup
Heavy body acrylic is a workhorse, but it doesn't last forever once opened. We date every tube on the bottom with a permanent marker. In our inventory system, we track the date the same way you'd use a chronological age calculator—it tells us how long each product has been in storage. If a bottle sits unused for more than two years, we move it to the test-and-prime bin instead of paying full cost on a new order.
You also need a cleanup plan. Acrylic dries fast, and that's the source of many messes. Warm soapy water works for wet paint, but once acrylic hits a wooden table, it becomes another project.
And if you ever need to know how to get permanent marker off wood—because that's inevitable in a school setting—here's the short version. Dampen a clean cloth with isopropyl alcohol (70% or higher) and blot, don't rub hard. The alcohol lifts most permanent inks. Test an inconspicuous area first, and don't flood the wood. If the marker has been there for months, let the alcohol sit for a few seconds before blotting. I'm not 100% sure this works on every finish, especially with marker that has soaked into unsealed wood, but in our experience it works well before sanding becomes necessary.
If something still feels off
A few caveats:
- This approach worked for our district because we have storage space and a predictable schedule. If you're a small store serving lots of different customers, your palette should be based on what customers actually ask for, not what a budget worksheet says.
- Liquitex Heavy Body is thicker than many student-grade paints. That's a feature, but it means some students over-dilute it. Include a quick lesson on how much water is too much, because the budget won't survive on raw paint alone.
- Don't ignore more affordable lines for basic projects. Liquitex Basics or other student acrylics have their place. Our program uses Heavy Body for art-focused classes and a lower-cost line for general classroom projects.
Bottom line
Liquitex heavy body acrylic paint reviews often talk about pigment strength and thick consistency. Those things matter, but from a procurement perspective, the winning argument is cost per successful student painting. Compare the price per ml, read the labels, build a mixing chart, track how long paint stays open, and keep a bottle of isopropyl alcohol near the wooden tables.
The paint you stock shapes the work your students produce. If the finished work looks serious, the program feels serious. That's not a marketing line—it's the same quality-and-reputation calculation we use for every purchase over $500.

Elena Baptista
Elena Baptista is an office printing and imaging analyst covering laser and inkjet printers, multifunction devices, copiers, label and receipt printers, ink cartridges, toner cartridges, and drum units. She applies ISO/IEC 24734, ISO/IEC 24711, and ISO/IEC 19798 methods while comparing print speed, first-page time, duplex throughput, duty cycle, page yield, coverage assumptions, resolution, color consistency, energy use, and maintenance intervals. Her guides help offices, schools, dealers, and procurement teams match output volume, media handling, connectivity, consumable economics, service access, and fleet-management requirements.