Liquitex Basics Acrylic Paint Reviews + Satin Varnish: Field Notes From 300+ Rush Art Supply Orders
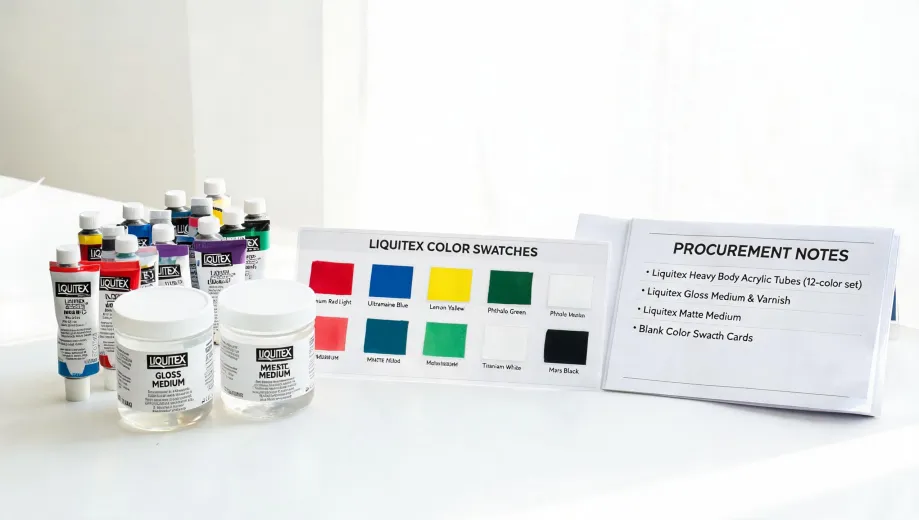
- Why I Recommend Liquitex Basics for Classrooms and Student Work
-
How I Use Liquitex Satin Acrylic Varnish in Real Orders
-
The Step-by-Step: Fast Varnish Protection for a Completed Acrylic Painting
-
Products I Don't Recommend Liquitex Basics For
-
Common Mistakes When Choosing Liquitex Products (From Real Orders)
-
Where Liquitex Sits in the Broader Market
-
When to Buy Online vs Local — Yes, This Relates
-
What a Reliable Art-Supply Order Actually Costs (Rough Figures)
-
Frequently Asked Questions I Actually Answer
-
Bottom Line, From Someone Who Handles the Rush Orders
I coordinate rush orders for a company that supplies art materials to schools and independent painters. Over the last three years I've processed roughly 300+ orders that involved Liquitex products, maybe half of them with a 48-hour deadline attached. This is not a comprehensive review. It's a field guide based on what breaks, what gets returned, and what actually saves a project when the clock is running.
Let me be clear about the limits: my experience is mostly with the Basics line and Liquitex Satin Acrylic Varnish, not the entire Professional range. If you're working with their heavy-body professional paints on commission pieces, some of what I say here will still apply, but I can't speak to every pigment's lightfastness or exactly how each color behaves over decades. I've seen enough repaints to know where the line is.
Why I Recommend Liquitex Basics for Classrooms and Student Work
If you're buying paint for an art classroom, a community workshop, or a student's first serious portfolio, Liquitex Basics is the safe call. Not because it's the best acrylic on earth — it isn't — but because it's consistent and affordable at volume.
I've had school orders come in on Tuesday for a Thursday exhibition. When that happens, the last thing I want is a paint that behaves differently from batch to batch. Basics has been stable for me across the last three years. Same viscosity, same drying time, same coverage on standard canvas and paper.
There's an honest limitation here. If you're a working artist doing gallery pieces and you need maximum pigment load and minimum binder shift, you probably want the Liquitex Professional Heavy Body line or a brand like Golden. Basics isn't designed for that. It's a student-grade paint that performs above its price point. Knowing that distinction saves a lot of frustration.
One thing most reviewers don't mention about Basics
The paint is a bit thinner than the Professional line. That's not a flaw — it means you can do smooth washes without adding a ton of water and losing adhesion. But it also means you need to build up layers for full opacity, especially with colors like yellow ochre and cadmium red hue. I mention this because a teacher once emailed me upset that the paint looked "translucent." It is. Soluble. Just plan for two coats and you'll be fine.
Every time I see a review complaining that Basics is "too runny," I suspect someone expected heavy body behavior from a student line. That's like buying a sedan and complaining it isn't a truck. Different tools.
How I Use Liquitex Satin Acrylic Varnish in Real Orders
I get a lot of questions about Liquitex Satin Acrylic Varnish, mostly from buyers who are nervous about ruining a finished painting. Good news: it's forgiving.
For the last 18 months, nearly every school order we've shipped included either the 118ml or 237ml bottle of Satin Varnish. Teachers like the satin finish because it doesn't glare under classroom lights the way gloss can, and it doesn't mute colors the way some mattes do. It sits in that practical middle.
Application tip from someone who's watched a lot of students shake varnish like a cocktail shaker: don't do that. You'll get bubbles in the finish. Stir it gently, apply thin coats, and let each coat dry fully before adding another. Two thin coats beats one thick coat every time.
I also use it on top of acrylic-painted furniture and craft projects, not just canvas. It holds up well on wood and primed surfaces. I'd still recommend sealing furniture with a more durable polyurethane if it's going to see heavy handling, but for decorative pieces and signs, Satin Varnish is enough.
One caution: if you're varnishing a textured work where you used heavy gel medium or modeling paste, coat the raised areas carefully. The varnish can pool in depressions and look cloudy when dry. I learned this when a client's textured piece came back with white-ish pockets in the crevices. Light touch, thin coats.
The Step-by-Step: Fast Varnish Protection for a Completed Acrylic Painting
If you need a finished painting protected before delivery or exhibition, here's exactly what I tell my clients, step by step.
Step 1 — Check that the paint is fully dry. Acrylic paint may feel dry in an hour, but it's actually curing internally for days. Wait at least 72 hours before varnishing. I know this feels slow, but doing it early means trapping moisture and getting weird cloudiness later.
Step 2 — Clean the surface carefully. Dust and hair land on wet paint all the time. Gently wipe the surface with a soft, dry microfiber cloth. If you need a damp wipe, use a very slightly damp cloth and let it dry completely before varnishing.
Step 3 — Stir, never shake. Shaking introduces air bubbles. Stir the varnish slowly with a clean stick or palette knife. If you're using the bottle's nozzle, shake it gently and let it rest for a minute before applying.
Step 4 — Apply thin coats. Use a wide, soft brush designed for varnish. Load the brush lightly and apply in smooth, parallel strokes. Overlap slightly to avoid missed spots. Don't go back over a section repeatedly — you'll pull the varnish and leave streaks.
Step 5 — Wait and repeat. Let the first coat dry for at least 4 to 6 hours in a dust-free room. Then apply a second thin coat. Most paintings need two coats, heavy textures can need three.
Step 6 — Cure before touching. The surface may feel dry in an hour, but the varnish layer is still soft. Let it cure for at least 48 hours before stacking, framing, or shipping. If you're visiting a client's exhibition, don't let anyone press a finger into the surface to "test" it. It happened once. The fingerprint is still there.
Products I Don't Recommend Liquitex Basics For
Cherish the honesty, because a lot of reviews don't include this. I don't recommend Basics for:
- Fine-art portfolio pieces requiring high pigment load — use Professional Heavy Body or Golden Fluid.
- Pouring or fluid art techniques — you need Liquitex Pouring Medium with it or a specifically fluid formula. On its own, Basics isn't thin enough.
- Spray paint style effects — it's not meant for airbrushing unless you add a dedicated flow medium.
- Those give you a realistic sense of when to upgrade.
Also: don't use Basics on flexible surfaces like fabric or leather without a flexible medium. Acrylic paint can crack on cloth that moves a lot. I've heard enough fabric-painting stories that ended in crackled disappointment.
Common Mistakes When Choosing Liquitex Products (From Real Orders)
I've tracked recurring mistakes we see in orders, returns, and support calls.
Mistake #1: Buying Basics for professional commissions. I love this paint, but it's student-grade. If you're selling a painting, students who need to figure out what the paint can do, they'll be happy with Basics. But for pro work, spend the extra on the Professional line. The pigment load, color consistency, and archival quality are better.
Mistake #2: Assuming all varnishes are the same. Liquitex makes gloss, matte, and satin finishes. They also make varnish in spray form and brush-on. They are not interchangeable. Spray is great for textured works, brush-on gives a smoother finish on flat surfaces, but spraying a 30x40" canvas outside in the wind is a lesson in regret.
Mistake #3: Varnishing before the paint has cured. This causes clouding and adhesion problems. If you absolutely must varnish sooner than 72 hours, use varnish that says "isolation coat" and accept the risk.
Mistake #4: Over-thinning Basics with water. When you add more than about 25% water, acrylic paint loses its binder's integrity. That's when the paint lifts or cracks. Use Liquitex Satin Varnish for glazing instead — that's what it's for.
Where Liquitex Sits in the Broader Market
I've worked with Golden and Windsor & Newton as well. Golden is excellent for artists who want intense pigment load and fluid handling. Windsor & Newton has a solid line, too. I don't have a dog in the fight of "Liquitex vs Golden vs Winsor & Newton" debates. The truth is, all three are good, but they're optimized for different workflows.
I've seen review sections devolve into brand loyalty arguments. The useful model is: Liquitex has the widest system for acrylics — their professional line, Basics, mediums, and varnishes work together smoothly. Golden has a more niche but extremely high-quality offering. Winsor & Newton remains solid if you're already in their ecosystem. Each brand has its strengths and you should pick based on your process.
And no, Liquitex is not making your printer ink. That's a different manufacturing world entirely.
When to Buy Online vs Local — Yes, This Relates
I'm a coordinator for online orders, but I'll tell you straight: sometimes local wins. Buying Liquitex online is great for:
- Volume purchases — 25+ bottles, sets, classroom quantities
- Specific varnish formulas that local stores don't stock
- Rush orders — as fast as same-day depending on product and distance
But if you need one tube of a specific color and you need it in your hand this afternoon, support your local art store. Online shipping won't save you. The same rule applies to a lot of supplies, actually.
And when you find an online supplier that offers guaranteed turnaround, remember that the value isn't always the speed. Sometimes the value is simply knowing the package will arrive on a specific date. Certainty is a feature. It matters in ways that are often much more than a "premium."
What a Reliable Art-Supply Order Actually Costs (Rough Figures)
Pricing moves fast, so treat these as ballpark figures as of Q1 2025:
- Liquitex Basics (120ml): roughly $5–8 per bottle.
- Liquitex Basics (250ml): roughly $10–15 per bottle.
- Liquitex Satin Varnish (118ml): roughly $8–12.
- Liquitex Satin Varnish (237ml): roughly $14–20.
The gap between a $6 Basics tube and a $15 Professional tube gets easier to justify when you calculate total cost of ownership: reprints, frustration, and hours of extra layers. The most expensive paint is the one that fails every project. Basics is fine for school, but trying to make it always do "professional" work is where people lose money.
I helped one school place an order totaling about $1,200 in Q3 2024. By choosing Basics sets plus 20 bottles of varnish, they covered four classrooms for a semester. Their total cost per student ended up under $20. That's why I recommend it for education use.
Check current pricing on Blick or Jerry's Artarama. Those two are reliable. Amazon pricing fluctuates wildly — I've seen Basics at $9 and at $15 for the same bottle within two weeks.
Frequently Asked Questions I Actually Answer
Is Liquitex Basics good for canvas painting? Yes. It's student-grade, but it adheres well to properly primed canvas and is perfectly acceptable for learning and practice. Just plan for two coats of the lighter colors.
Wait, which varnish do I need for a final finish? Choose satin for no glare and minimal color shift, gloss for vivid color, matte for reducing reflections. Satin is the safest for most classroom projects.
Can I use Liquitex Satin Varnish over oil paint? No. Acrylic varnish is formulated for acrylic paint. For oil paint, you need a mineral-spirit-based varnish. Attempting to use acrylic varnish over oil will lead to adhesion problems.
What if my varnish looks cloudy after drying? It could be trapped moisture, or applying over wet paint. Usually a second thin coat after drying with more ventilation and a more careful technique solves it. If not, you may need to strip and redo it. That's a hard lesson, but we've all been there.
Is there a difference between Liquitex Satin Varnish and Liquitex Soluvar? Yes. Regular varnish is designed to be permanent and non-removable without harsh chemicals. Soluvar is a removable varnish, which is what you use if you want the painting to be reversible for future conservation. For most student and classroom work, the regular is fine.
Bottom Line, From Someone Who Handles the Rush Orders
If you're buying for a classroom, a community studio, or a hobbyist who wants a reliable student-grade paint, Liquitex Basics is a solid foundation. Add Liquitex Satin Varnish to the order and you're protecting their hard work with minimal hassle. If you're a professional artist, save the debate for the Heavy Body line and skip the student grade for commissions.
Don't forget the practical details: check the pigment names for the "hue" suffix — if you're buying "cadmium red hue," that's not the same as a true heavy-metal pigment. It's a safer formulation, but it's not the same pigment. And if you're buying paint for a class full of beginners, expect that some of it will be wasted. That's part of the art. There's no way to make mistakes not happen. Just cheap enough to make mistakes not hurt.
Prices and product lines change. Always verify current specs with your supplier before placing a large order. And if you're on a deadline, know your supplier's rush options before the panic call.

Elena Baptista
Elena Baptista is an office printing and imaging analyst covering laser and inkjet printers, multifunction devices, copiers, label and receipt printers, ink cartridges, toner cartridges, and drum units. She applies ISO/IEC 24734, ISO/IEC 24711, and ISO/IEC 19798 methods while comparing print speed, first-page time, duplex throughput, duty cycle, page yield, coverage assumptions, resolution, color consistency, energy use, and maintenance intervals. Her guides help offices, schools, dealers, and procurement teams match output volume, media handling, connectivity, consumable economics, service access, and fleet-management requirements.