How to Start a Journal with Liquitex Basics Acrylic Paint: A Last-Minute Checklist
-
Who This Checklist Is For
-
Step 1: Gather Your Materials (Check Twice)
-
Step 2: Prepare the Surface – Don’t Skip the Gesso
-
Step 3: Choose Your Color Palette Using the Liquitex Color Chart
-
Step 4: Design Layout – Use Graph Paper as a Stencil
-
Step 5: Paint Efficiently – Layering vs. One‑Coat
-
Step 6: Seal the Deal – Varnish While You Wait
-
Step 7: Assemble the Finishing Touches
-
Common Mistakes to Avoid
Who This Checklist Is For
If you’ve ever had a gift idea at 9 PM and needed it ready by tomorrow morning – or you promised a friend a custom journal and suddenly realized the deadline is today – this guide is for you. I’ve been in that exact spot more times than I can count. In my role coordinating rush orders at a specialty art supply company, I’ve seen clients call at 4 PM needing a fully decorated journal for an event the next morning. The first time it happened, I almost panicked. Now? It’s routine.
This checklist covers everything from choosing the right Liquitex products to drying and sealing your work – in 7 steps, each with concrete takeaways. You will have a finished journal cover (or desk accessory) that looks like it took days, not hours.
Step 1: Gather Your Materials (Check Twice)
Nothing slows a rush project like realizing you’re out of gesso mid‑stroke. Here’s what you need:
- A blank journal or notebook – any size, but check the paper weight (at least 100 lb / 160 gsm if you’re painting directly).
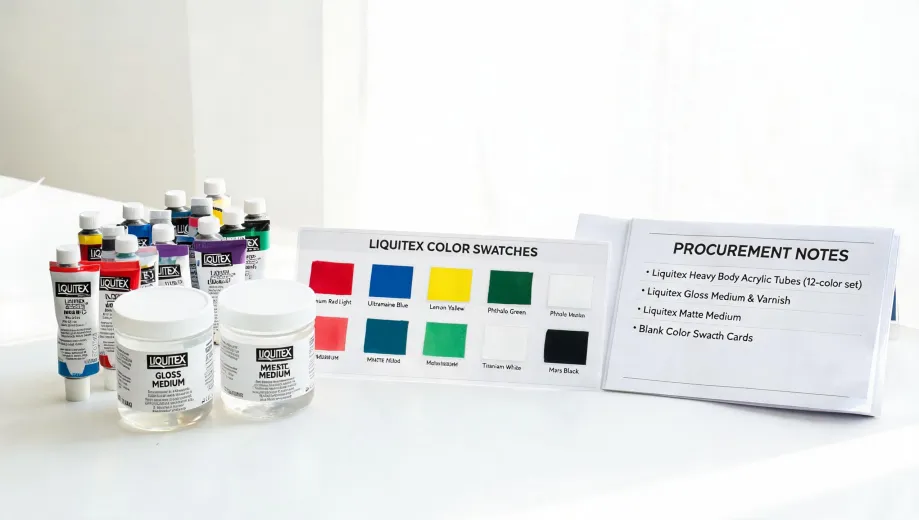
- Liquitex Basics Acrylic Paint (48‑color set) – perfect for mixing and layering. The set covers every hue you’ll likely need.
- Liquitex Acrylic Ink Color Chart – if you want translucent washes, grab a few ink bottles. The color chart helps you pick fast.
- Brushes – synthetic flat and round, sizes 2, 6, and 10.
- Graph paper printable – print a few sheets on plain copy paper for stencil or geometric patterns.
- Palette, water cup, paper towels – obvious, but easy to forget.
- Liquitex Gesso or Clear Gesso – don’t skip this (see my mistake in Step 2).
- Liquitex Varnish (Gloss or Matte) – for protection after painting.
Pro tip: Lay everything out on your home office desk before you start. I once spent 10 minutes hunting for a palette while the paint dried on my brush. (Note to self: always prep the workspace first.)
Step 2: Prepare the Surface – Don’t Skip the Gesso
I knew I should prime the journal cover, but thought, “What are the odds of bleed‑through?” Pretty high, as it turned out. On a rush job in March 2024, I painted directly onto a kraft‑paper notebook. The moisture warped the cover, and the colors turned muddy. I had to start over with a new notebook – wasted 40 minutes.
Apply one thin coat of Liquitex Clear Gesso (or white Gesso if you want a brighter base). Let it dry for 15 minutes with a fan. That’s it. The surface will grip the paint evenly, and the paper won’t buckle.
Step 3: Choose Your Color Palette Using the Liquitex Color Chart
If you’re pressed for time, deciding colors on the fly is a trap. The Liquitex Basics 48‑color set comes with a printed chart, but I always keep a digital copy downloaded (Liquitex offers PDFs on their site). Pick 3–5 colors that complement each other. For a journal cover, consider:
- A dominant hue (e.g., Ultramarine Blue)
- A contrast accent (e.g., Cadmium Red Medium)
- A neutral (e.g., Titanium White, Raw Umber)
- Optional: a metallic or interference shade for highlights
Write down your choices. I use sticky notes stuck to my desk – saves me from second‑guessing mid‑stroke.
Step 4: Design Layout – Use Graph Paper as a Stencil
You don’t need freehand confidence. Print a sheet of graph paper (1/4″ or 1/2″ squares) and use it to plan your composition. For example:
- Draw a simple geometric pattern (stripes, triangles) directly on the graph paper.
- Cut out the shapes and trace them onto the journal cover lightly with pencil.
- Or fold the graph paper, cut a symmetrical stencil, and tape it in place.
I once created a repeating diamond pattern using a 6×6 grid from a free printable graph paper site. Total time: 3 minutes for layout, 20 minutes for painting.
Step 5: Paint Efficiently – Layering vs. One‑Coat
Liquitex Basics are student‑grade but still offer good opacity. For solid backgrounds, apply two thin coats (wait 10 minutes between). For soft washes (if using Liquitex Acrylic Ink), dilute with water up to 30% or use the ink directly from the bottle.
Work in sections: background first, then large shapes, then details. Keep a water spray bottle handy to keep the palette moist. Nothing worse than losing a mixed color because it dried while you painted elsewhere.
Step 6: Seal the Deal – Varnish While You Wait
Acrylic dries fast, but for a journal that will be handled, you need a protective coat. Once the paint is dry to the touch (about 30 minutes depending on humidity), apply Liquitex Soluvar Gloss or Matte Varnish. Use a soft brush, thin layer. If you’re in a hurry, you can use a spray varnish (Liquitex Spray Varnish) – it dries in 10 minutes.
Important: Wait until the varnish is fully cured before closing the journal. I’ve seen pages stick together because someone closed the book too soon. (That was me. Yes, I felt stupid.)
Step 7: Assemble the Finishing Touches
Now attach any extras – a ribbon bookmark, a pocket on the inside cover made from leftover graph paper, or a small tag with the date. If you printed extra graph paper, you can trim it to size and glue it onto the inside cover as a quick “notes” section.
One last check: flipping through the journal to ensure pages lie flat and no paint transfers. If everything looks good, pat yourself on the back. You just turned a blank notebook into a one‑of‑a‑kind art piece in under 4 hours.
Common Mistakes to Avoid
- Skipping the gesso – you’ll regret it when the paper warps or the paint soaks in unevenly.
- Using too much water – especially with Liquitex Basics, over‑dilution weakens the binder. Keep water to max 30%.
- Rushing the drying time – even quick‑dry acrylic needs a solid 20‑30 minutes between coats if you want crisp layers.
- Forgetting the varnish – without a sealant, the cover will scuff and collect dust. Test your varnish on a scrap first.
Everything I’ve learned about rush projects came from making exactly these mistakes. The conventional wisdom says “plan ahead.” My experience? Sometimes you just need a solid checklist and the right materials. An informed customer – that’s you – will ask better questions and finish faster.
Bottom line: Grab your Liquitex Basics, print that graph paper, and start. You’re only 7 steps away from a journal that looks like you spent all week on it.

Elena Baptista
Elena Baptista is an office printing and imaging analyst covering laser and inkjet printers, multifunction devices, copiers, label and receipt printers, ink cartridges, toner cartridges, and drum units. She applies ISO/IEC 24734, ISO/IEC 24711, and ISO/IEC 19798 methods while comparing print speed, first-page time, duplex throughput, duty cycle, page yield, coverage assumptions, resolution, color consistency, energy use, and maintenance intervals. Her guides help offices, schools, dealers, and procurement teams match output volume, media handling, connectivity, consumable economics, service access, and fleet-management requirements.