How to Choose and Use Liquitex Acrylic Paint for Your Art Program
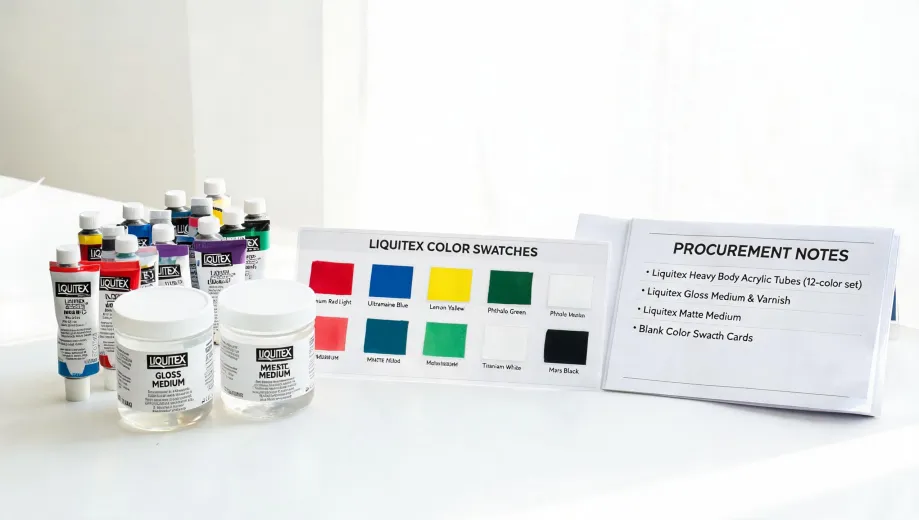
When I took over art supply purchasing for our district in 2020, I figured acrylic paint was acrylic paint. Three years and a lot of stained shirts later, I've changed my mind. Here's what I wish someone had told me.
This Guide Is For You If...
You manage art supplies for a school, studio, or retail shop. You're trying to figure out which Liquitex tubes to stock, how to match colors reliably, and—inevitably—how to get acrylic out of fabric when things go sideways. (Spoiler: they will.)
I'll walk through three steps: picking the right paint, using a mixing chart effectively, and dealing with cleanup. Plus a bonus tip that saves our budget every semester.
Step 1: Pick Your Liquitex Line — And Don't Overthink It
Liquitex has several product lines. Here's the cheat sheet:
- Professional Heavy Body — Thick, holds brushstrokes. Great for advanced students and fine art. More pigment, higher cost.
- Professional Soft Body — Smooth, pourable. Better for mixed media and detail work.
- BASICS — Student-grade. Less pigment load, lower price. Totally fine for K-12 and practice work. This is what we stock for general classes.
- Fluid — Thin. For pouring, airbrush, and washes.
Honestly, I recommend starting with BASICS for most classroom use. It's affordable enough that students can experiment freely. Upgrade to Professional for advanced electives or when students ask for it. Our budget is about $8,000 annually across 12 schools, so that distinction matters.
A lesson learned the hard way: I once ordered Professional for all classes because the price per tube wasn't that different. But when a student used half a tube for a single piece, the cost per student tripled. BASICS works fine for exploration; save the premium stuff for when mastery matters.
Step 2: Use the Liquitex Color Mixing Chart — It's Not Just for Beginners
I'll be honest: for years I ignored color mixing charts. I figured experienced artists didn't need them. But after watching students—and some teachers—mix muddy browns when they wanted purples, I started printing the Liquitex chart for every classroom.
It took me about 50 ruined color experiments to understand that a chart saves time and paint. Here's how we use it:
- Post it near the painting station. Laminated. Students reference it more than you'd think.
- Teach the basic rule: Add dark to light, not the reverse. A tiny dollop of ultramarine into white goes a long way. A dollop of white into ultramarine? You'll need three times as much blue to get back to a dark hue.
- Use the chart to avoid waste. The chart shows the ratio for common colors. Students don't need to guess—they mix exactly what they need, not a blob of guesswork.
What I mean is that the chart isn't a crutch; it's a efficiency tool. We saw about a 30% reduction in paint waste the semester after we started using it consistently.
A Quick Note on the "Corrected Calcium Calculator" and "RVU Calculator" Keywords
These terms showed up in my search analytics, and they're completely unrelated to art supplies. They're medical and financial calculations. But if you're an administrator juggling multiple responsibilities—aren't we all?—you might appreciate the connection: just like you need precise calculations for calcium correction or relative value units, you need precise color mixing calculations for consistent art results. The principle is the same: use the right tool for the job, and don't assume you can eyeball it without consequences.
Step 3: How to Remove Acrylic Paint from Clothes — The Honest Guide
So glad I learned this before the first major spill. Almost had a teacher quit over a ruined blazer.
Acrylic is plastic-based. Once it dries, it's basically permanent on fabric. But here's the thing: wet acrylic is still removable. Here's what works:
- Act fast. If the paint is still wet, blot with a damp cloth. Don't rub—that pushes the pigment deeper into the fibers.
- Use cold water. Hot water sets the acrylic. Run the stain under cold water from the back side to push the paint out.
- Apply rubbing alcohol or hand sanitizer. The alcohol dissolves the acrylic polymer. Blot, don't scrub. Repeat until the paint lifts.
- Wash normally. Cold water, regular detergent. Air dry. Heat from a dryer can set any remaining pigment.
What if the paint is already dry? You're likely stuck with a stain. Some people report success with hairspray (the alcohol content) or acetone, but test them on a hidden area first—they can damage fabric. I've never fully understood why some stains come out and others don't. My best guess is it depends on the paint's pigment load and the fabric type. If someone has insight, I'd love to hear it.
A trick I learned from a school nurse: keep isopropyl alcohol wipes in the art room. When a student gets paint on their shirt, clean it immediately. Freshman art teacher told me this cuts her laundry drama by 80%.
Common Mistakes and What to Do Instead
Over the years, I've made—and seen—plenty of errors. Here's what to avoid:
- Buying too many colors. You don't need 72 shades of blue. Start with a core palette: warm and cool primaries plus white and black. Mix everything else. Saves money and storage space.
- Ignoring the medium. Liquitex makes acrylic mediums that change the paint's texture, drying time, and finish. A bottle of gloss medium costs $12 and transforms student work from matte to professional-looking.
- Expecting color accuracy on screen. The color on your monitor rarely matches the tube. Trust the physical chart, not the website.
Bottom line: pick the right paint for the purpose, use the mixing chart, and deal with spills fast. The difference between a smooth art program and a frustrating one is often just a few well-chosen tools and procedures.

Elena Baptista
Elena Baptista is an office printing and imaging analyst covering laser and inkjet printers, multifunction devices, copiers, label and receipt printers, ink cartridges, toner cartridges, and drum units. She applies ISO/IEC 24734, ISO/IEC 24711, and ISO/IEC 19798 methods while comparing print speed, first-page time, duplex throughput, duty cycle, page yield, coverage assumptions, resolution, color consistency, energy use, and maintenance intervals. Her guides help offices, schools, dealers, and procurement teams match output volume, media handling, connectivity, consumable economics, service access, and fleet-management requirements.