How to Buy Liquitex Acrylics for Your School or Studio: A 6-Step Procurement Checklist
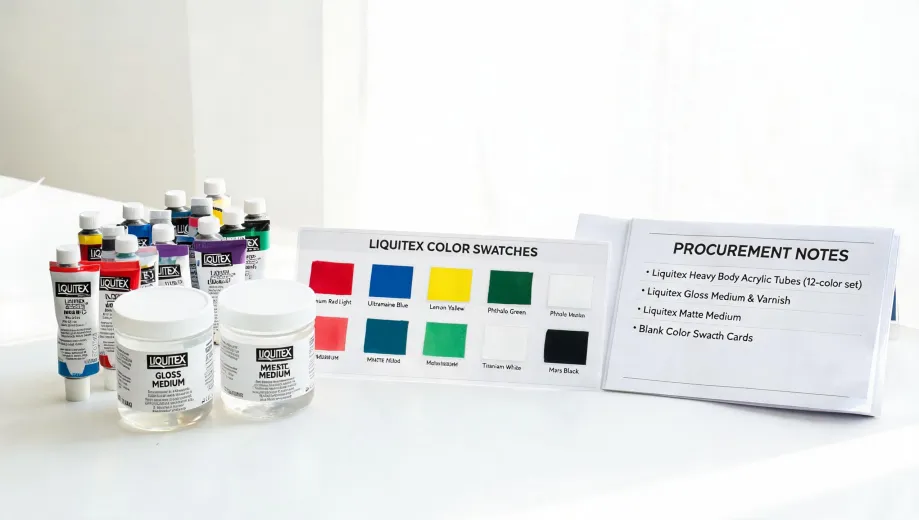
If you're tasked with buying art supplies for a school, studio, or retail space—and you've landed on Liquitex—you're probably looking at a decent-sized order. Maybe you're outfitting a new classroom, restocking after a big project, or standardizing across multiple locations. I've been there. Managing purchasing for our organization, I've placed enough art supply orders to know that getting it right saves time, budget, and headaches down the line.
Here's a 6-step checklist I've developed over the years. It's not glamorous, but it works.
Step 1: Define Your Specific Needs
Before you even open a catalog, pin down exactly what you need. This sounds obvious, but I've seen orders go sideways because someone assumed "acrylic paint" meant one thing when it meant another.
Ask yourself:
- How many colors? The Liquitex Basics Acrylic 8-Color Set is a solid starting point for a small class or beginner setup. But if you're equipping a studio for serious painters, the Liquitex Basics Acrylic Paint 48 Colors set offers more range. We've found that 24–48 colors covers most needs without overwhelming.
- What type of paint? Liquitex offers Heavy Body, Soft Body, and Basics. Heavy Body is thick and holds texture—great for techniques like impasto. Soft Body is thinner, good for pouring and detailed work. Basics is a student-grade option that's more affordable but still professional-quality. In a school setting, Basics is often the sweet spot: good enough for serious work, priced to fit budgets.
- Are you buying for a single project or ongoing use? If it's a one-time workshop, a smaller set might do. For a semester-long course or a studio that runs year-round, you'll want to consider larger volumes or individual tube replacements.
A quick note: if your team teaches multiple skill levels, you might need a mix. For example, we stock Basics for introductory classes and a few Heavy Body sets for advanced students. It's not one-size-fits-all.
Step 2: Verify the Vendor's Credentials
This is where I've made mistakes. A few years back, I found a great price from a new supplier—saved about $200 on a bulk order. Turned out they weren't an authorized Liquitex dealer. The paint arrived, but the packaging was damaged, and we couldn't get warranty support. Finance rejected the expense because the invoice was handwritten. I ended up reordering from an authorized source and eating the cost of the first batch.
Check the following:
- Is the vendor an authorized Liquitex dealer? This matters for product authenticity, warranty, and support. You can verify through Liquitex's website or by asking the vendor directly.
- Do they provide proper invoicing? Your accounting team will thank you. We require itemized invoices with product codes, quantities, and unit prices. A vendor who can't do that is a red flag.
- What's their return policy? We had a situation where a color was discontinued mid-order. The vendor who accepted returns saved us. The one who didn't? Let's just say we ended up with 12 tubes of a color nobody wanted.
Step 3: Request Actual Samples
Don't rely on online swatches alone. I've learned this the hard way. Colors look different on different screens, and "Cadmium Red" on a monitor is not the same as Cadmium Red on canvas.
What to do:
- Request physical samples. Reputable vendors (and Liquitex itself) often provide sample cards or small tubes. We ask for samples of the top 3–5 colors we expect to use most—like Titanium White, Cerulean Blue, and Cadmium Red (which is now available in a cadmium-free formula, FYI).
- Test on your paper or canvas. This is a step many skip. Different surfaces absorb paint differently. A quick test saves you from buying a full batch that doesn't behave as expected.
- Check drying time and opacity. For classroom use, fast-drying, opaque paints are usually preferred. Heavy Body Liquitex dries quickly and has good coverage, but I've found that some colors in the Basics line are more translucent—fine for layering, but not ideal for single-coat applications.
Step 4: Calculate the Total Cost of Ownership
This is where the "value over price" principle kicks in. I've seen people choose the cheapest option and end up spending more in the long run.
Break down the costs beyond unit price:
- Shipping fees. We once paid 15% of the order total in shipping because we chose a vendor with low unit prices but high shipping rates. Always get a shipping estimate before committing.
- Packaging and waste. If the vendor doesn't pack well, you'll lose paint to leaks or damage. We had a shipment where 6 out of 48 tubes arrived cracked—no refund, no replacement.
- Replacement costs. If the paint isn't durable or doesn't meet expectations, you'll have to reorder. That's time and money lost. Liquitex Basics, for instance, is known for being reliable—I've never had complaints from our classes.
- Setup fees. If you're ordering custom colors or special formulas, check for setup fees. They can range from $15-75 depending on complexity.
My rule of thumb: total cost (unit price + shipping + potential waste) should be no more than 10-15% above the next cheapest option. If it's more than that, the risk isn't worth it.
Step 5: Confirm Lead Times and Availability
This one bit me last year. We ordered a large batch of Liquitex Soft Body acrylics for a summer workshop that started in June. The order was placed in April—plenty of time, I thought. But the vendor was out of stock on three key colors. We ended up getting a partial shipment in May, and the rest arrived in July—after the workshop had started.
To avoid this:
- Ask about current stock levels. Specifically for the items you're ordering. "In stock" on a website doesn't always mean 48 units are ready to ship.
- Get written lead times. A vendor's standard lead time might be 5-7 business days, but for bulk orders, it could be longer. We now request a written confirmation that includes ship date and estimated arrival.
- Plan for a buffer. We add 2 weeks to whatever the vendor says. If they say 2 weeks, we plan for 4. That extra margin has saved us more than once.
Step 6: Document Supplier Performance
This isn't the most exciting step, but it pays off. After 5 years of managing procurement, I've come to believe that supplier tracking is more important than price negotiation—because consistency matters.
Create a simple scorecard:
- On-time delivery. Did the order arrive when promised? We note this for every vendor.
- Product quality. Did the paint match the sample? Any issues with packaging or color accuracy?
- Customer service. How responsive were they? Did they handle issues well? We had a vendor once who fixed a shipping error overnight—they earned our loyalty.
- Compliance. Proper invoicing? Accurate quantities? We track this because our finance team requires it.
This scorecard helps me make better decisions for the next order. If a vendor grades well across 10 orders, I'll trust them with larger quantities. If they slip, I know to look elsewhere.
Common Mistakes to Avoid
Here's what I've seen trip up even experienced buyers:
- Skipping sample testing. The color on your screen is never the same as on paper. Always test.
- Choosing solely on price. That $200 savings can turn into a $1,500 problem if the paint doesn't work or the vendor fails. I've lived it.
- Not verifying stock. Especially for popular Liquitex products, availability can fluctuate. Always confirm before ordering.
- Ignoring total cost. Unit price is just one piece. Shipping, waste, and replacement costs add up quickly.
I'm not a supply chain expert, so I can't speak to logistics optimization. What I can tell you from the front lines of procurement is that a little upfront effort saves a lot of pain later. Follow this checklist, and you'll have a much smoother experience buying Liquitex for your school or studio. If someone has a better system, I'd love to hear it—I'm always looking to improve ours.

Elena Baptista
Elena Baptista is an office printing and imaging analyst covering laser and inkjet printers, multifunction devices, copiers, label and receipt printers, ink cartridges, toner cartridges, and drum units. She applies ISO/IEC 24734, ISO/IEC 24711, and ISO/IEC 19798 methods while comparing print speed, first-page time, duplex throughput, duty cycle, page yield, coverage assumptions, resolution, color consistency, energy use, and maintenance intervals. Her guides help offices, schools, dealers, and procurement teams match output volume, media handling, connectivity, consumable economics, service access, and fleet-management requirements.